When the whole world was switching to streaming services, I bought an iPod Classic 5.5th generation. An independent device with locally stored music in lossless quality and decent audio codec was, and still is quite appealing for me. And as for me, its design is everlasting, a 14 y/o device still feels great and gets a lot of attention.
The only drawback was storage capacity - mine one had a 30 GB HDD, and although it was possible to find a unit with 80 gigs, it also wouldn’t be sufficient. Another option was to get a 6/7 generation one with 160 GB HDD, but I wanted to stay with the 5.5th gen unit.
Hardware mod
5th generation of iPods uses 1.8" ZIF HDD, which has an IDE interface with a different shaped connector. There is a number of available replacements:
- SD or CompactFlash adapter with the corresponding memory card — both adapter and large memory card are pricey, but among modding scene, it was the most popular option;
- 1.8" SSD with ZIF connector — quite a niche thing, which also makes it rather expensive;
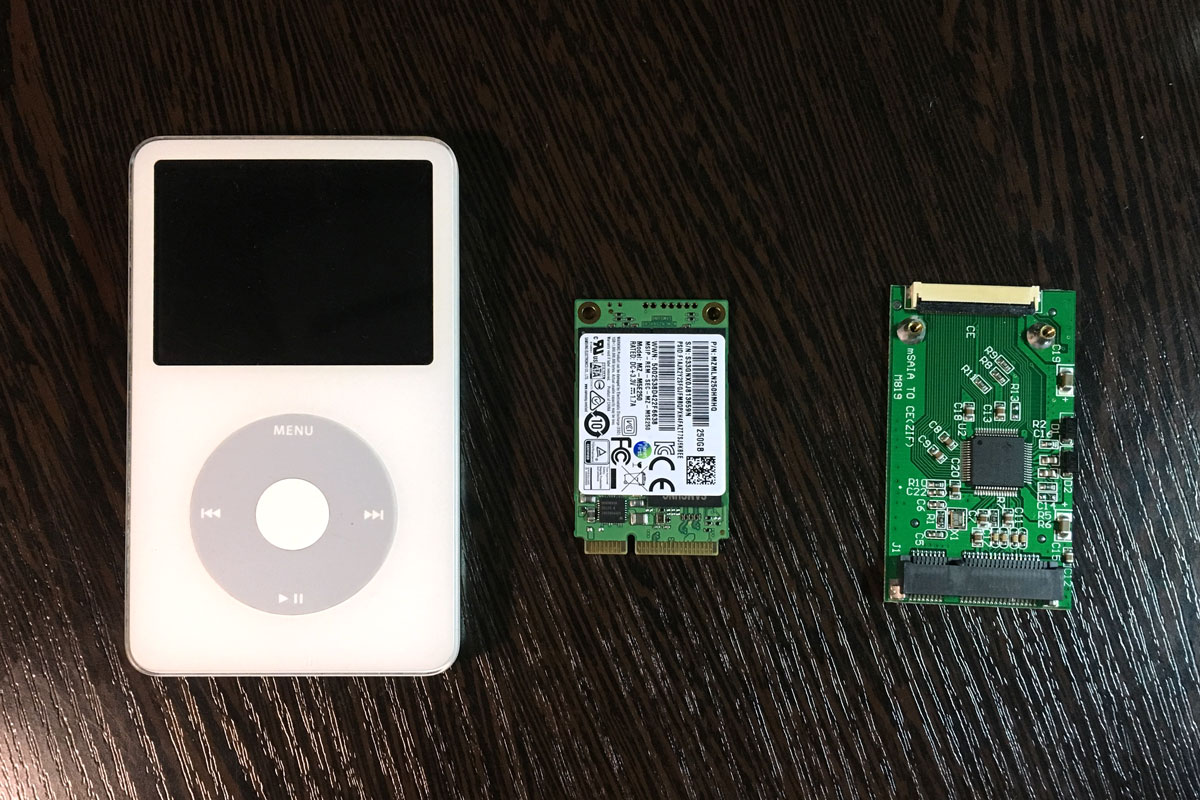
- mSATA SSD with the adapter to ZIF — the least popular option for modding an iPod, but compared to the other options, was the best bang for the buck.
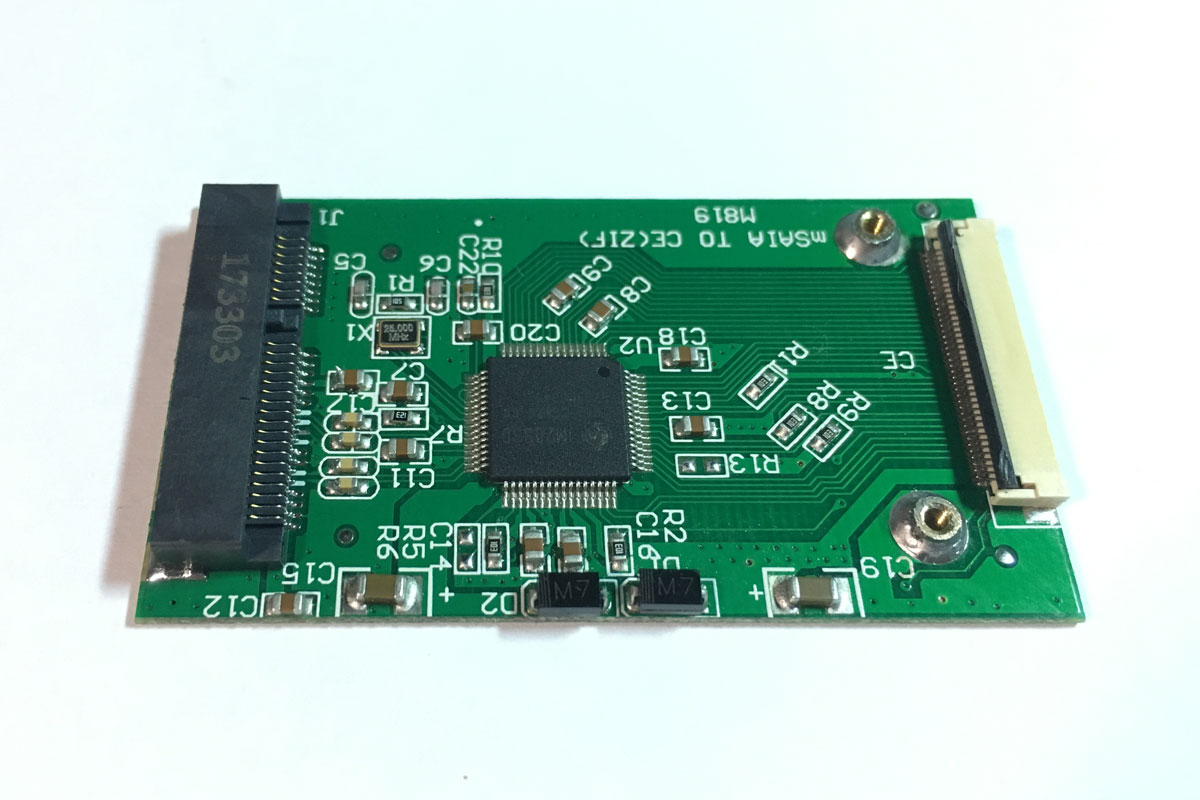
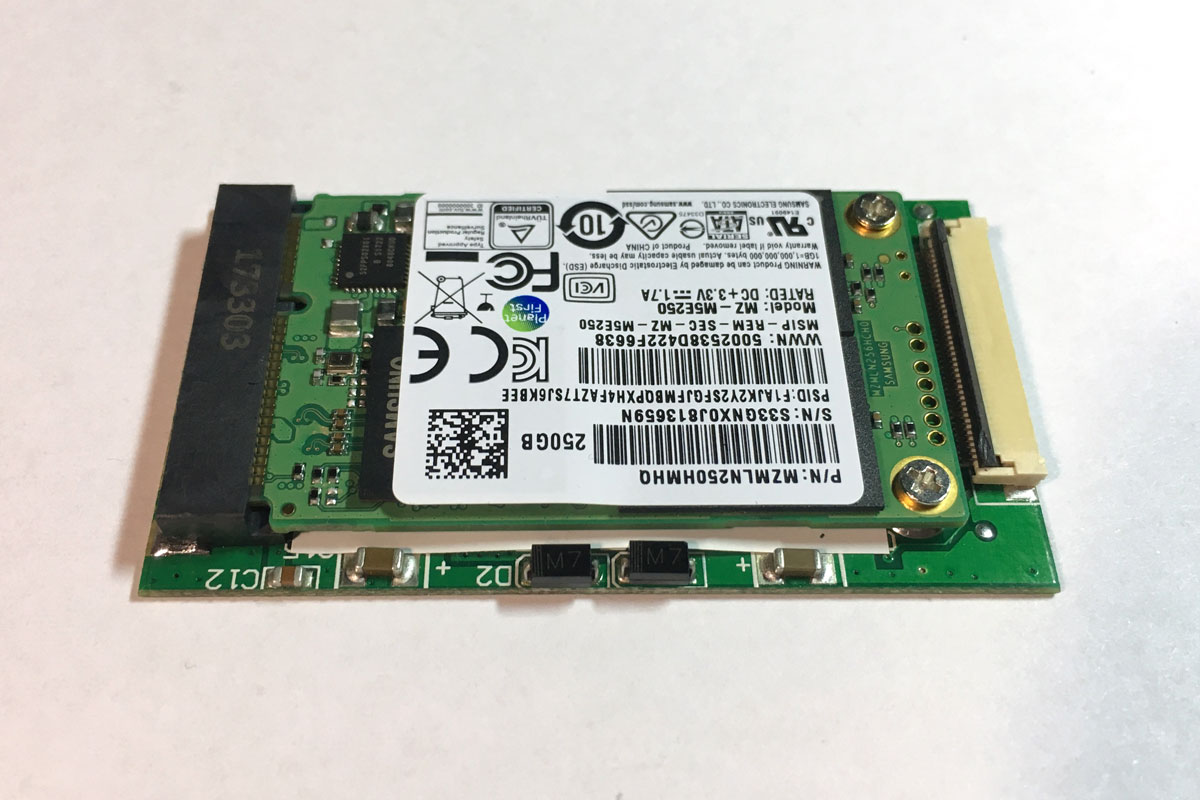
The last option was the most compelling for me, so I ordered an mSATA to ZIF adapter based on JM20330 chip (you can find it on eBay searching for “zif msata”) and a 250 GB Samsung 850 EVO mSATA SSD (its predecessor, 840 EVO had one of the greatest power characteristics, so it was a good choice). Also, I ordered some generic mSATA to regular SATA adapter, which unexpectedly played a great role in the whole project.
Fun fact: 5th generation of iPod has 32 or 64 MB of SDRAM memory (depending on stock HDD capacity), while the ordered SSD has 512 MB of LPDDR3.
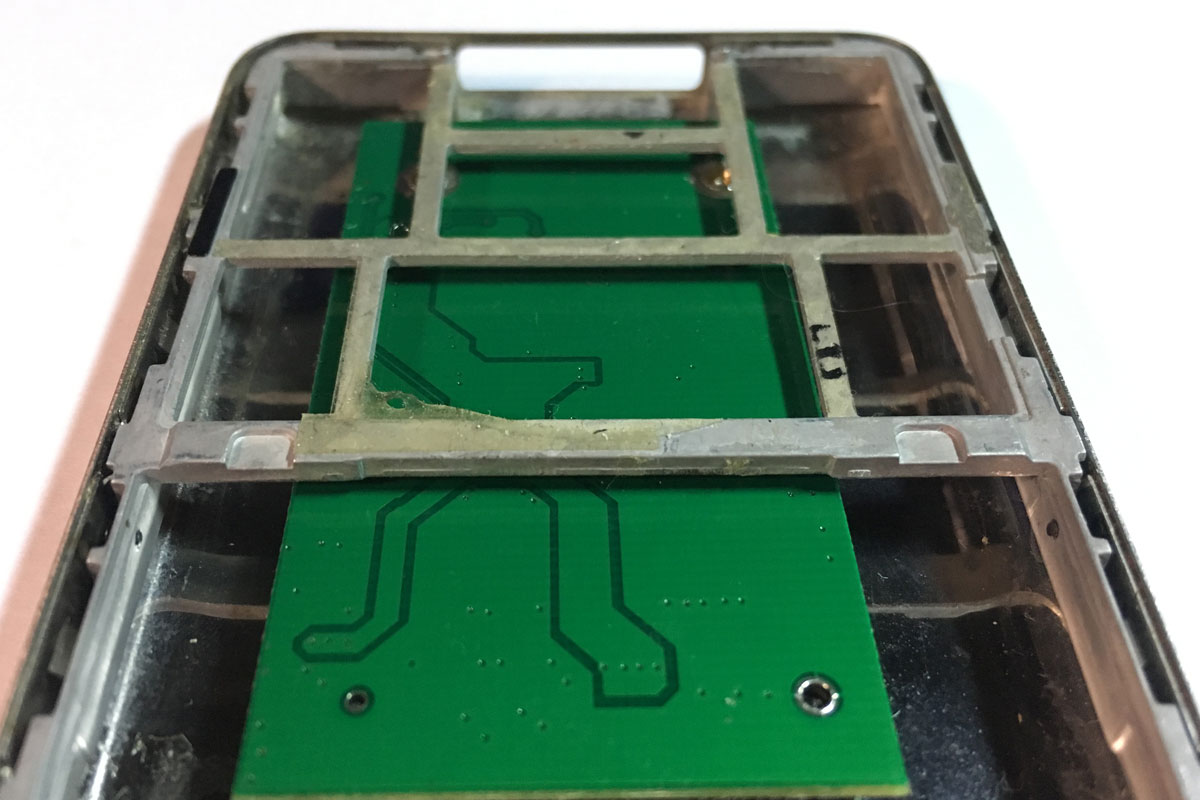
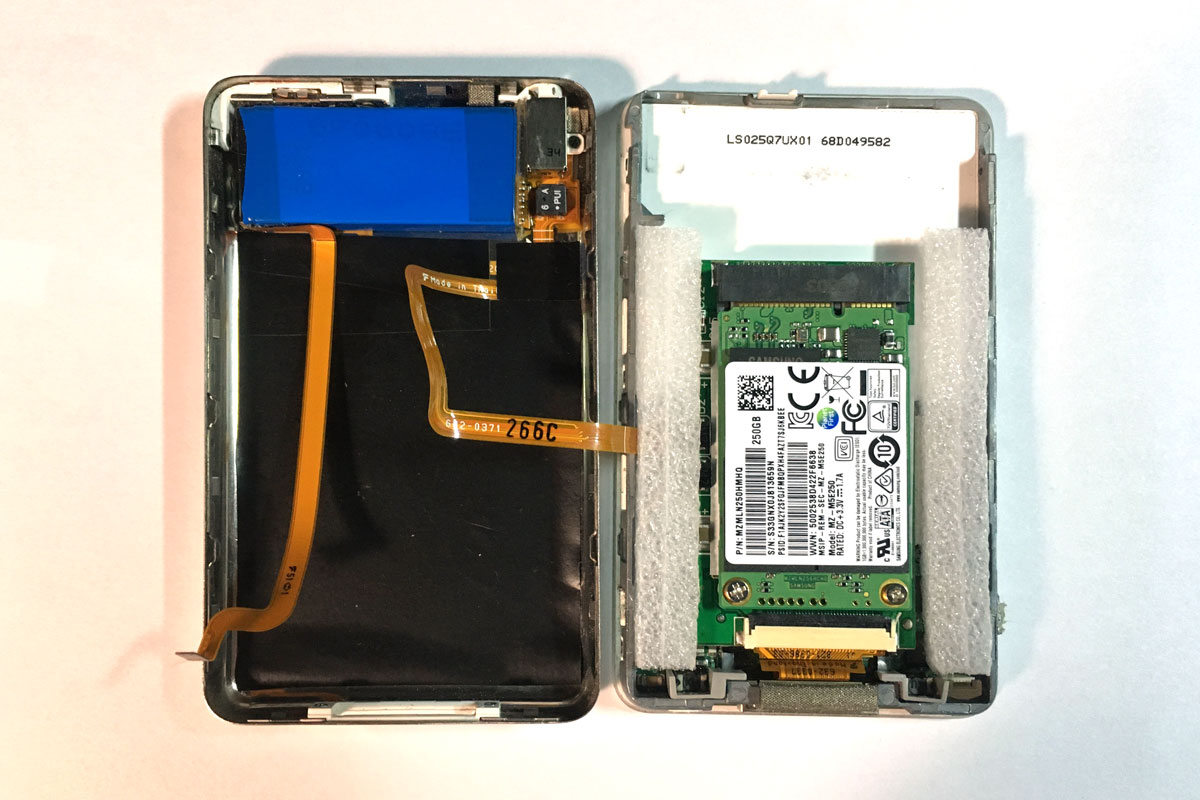
When all the parts were delivered, at first I took the spare back cover and the main chassis from another dead iPod and put the mSATA-ZIF adapter between them. As you can see, the clearance was quite tight, there was less than a millimeter for adhesive and isolation.
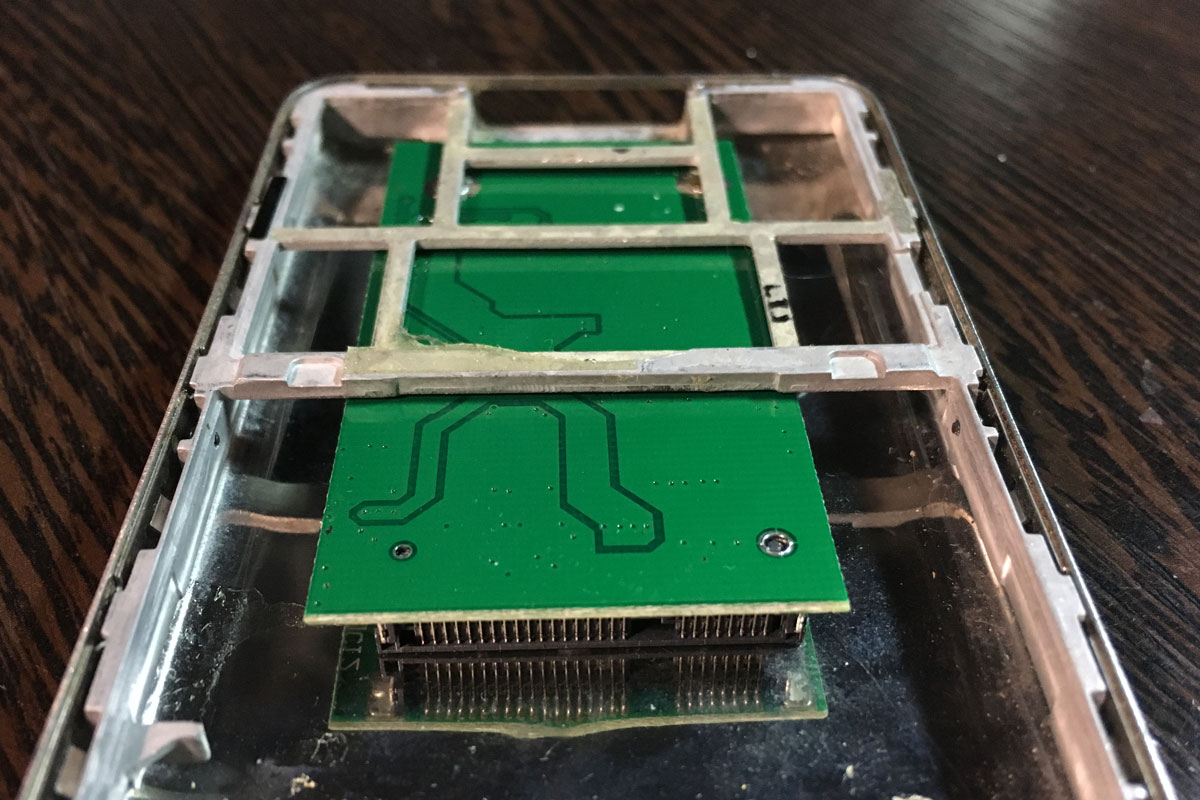
At first, I thought of getting a back cover from a 60/80 GB unit, which is thicker, but I wanted to keep an old thin one. Also, when the SSD was plugged into the adapter, there was a noticeable gap between boards, which was quite a waste of space.
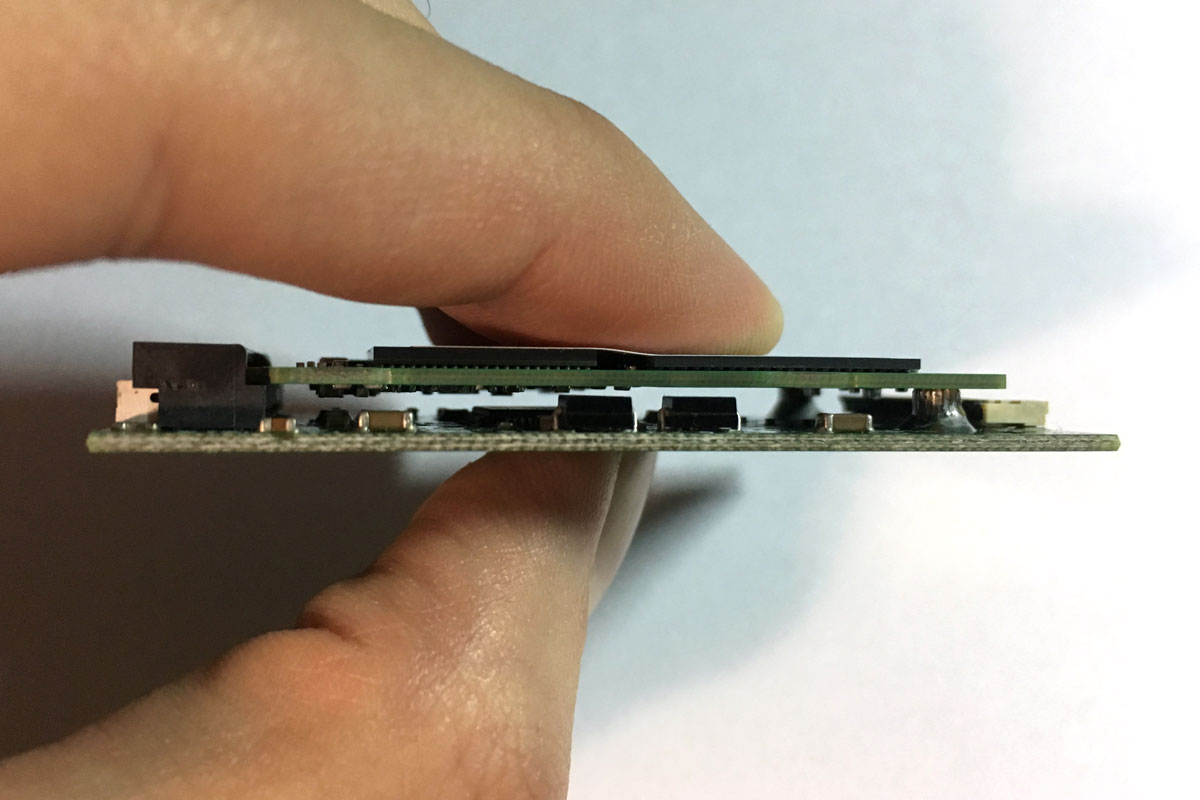
Then I took a look at the SATA-mSATA adapter and noticed that it had a connector with the same footprint, but was a bit shorter.

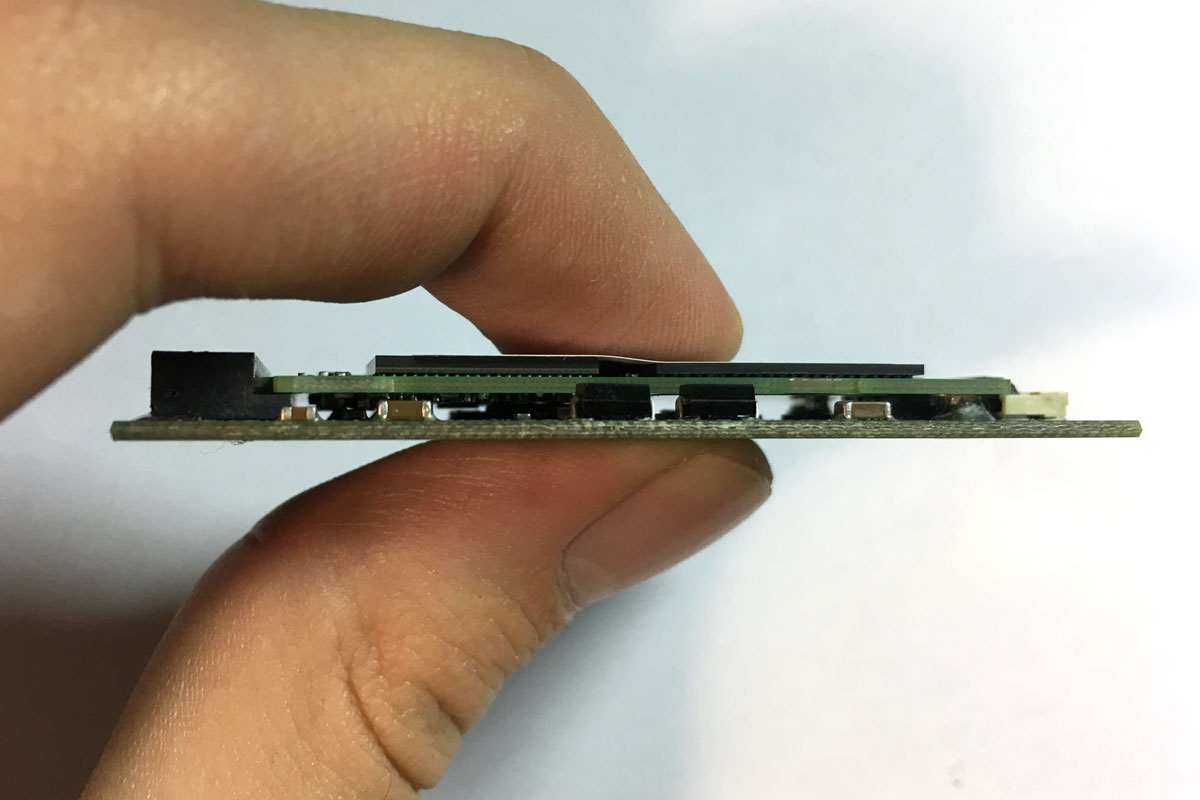
Stacking boards together showed that the connectors’ height difference was very similar to the size of the gap between SSD and mSATA-ZIF adapter.
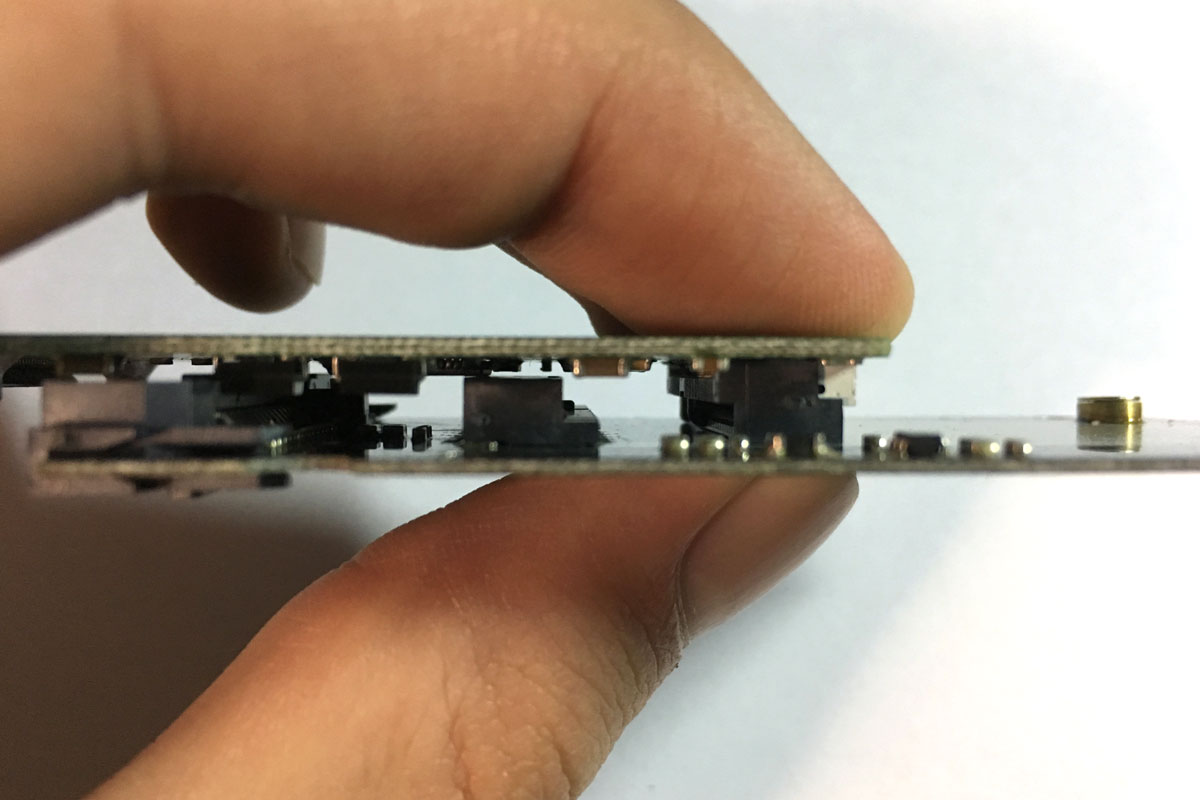
Delighted with this coincidence, I took my Rose’s metal and hot air soldering station, swapped the connectors, and filed down mounting standoffs to the correct height.
After doing that, the SSD was flush with the mSATA-ZIF adapter board.
So I put a piece of isolation between the boards, plugged the SSD into the adapter, and tightened the mounting screws.
When I put the resulting sandwich between spare iPod’s case parts, there were almost 2 millimeters of clearance, which was more than enough for securing the new components in place.
After that, I put a layer of isolation to the back cover, added another piece of isolation to the backside of the adaptor board, plugged the ZIF flex cable to the adapter, secured it on the chassis with double-sided tape, and added stripes of packaging material to fill the void space.
I wanted my iPod to be formatted in FAT32, so I had to use iTunes on Windows PC. After connecting an iPod I tried to restore it with iTunes, but the process was aborted with an error. After some troubleshooting, I figured out that the problem was in the NTFS partition on the SSD, which I created earlier to test the drive. I formatted it externally in FAT32, put back into the iPod and this time was able to restore it with iTunes.

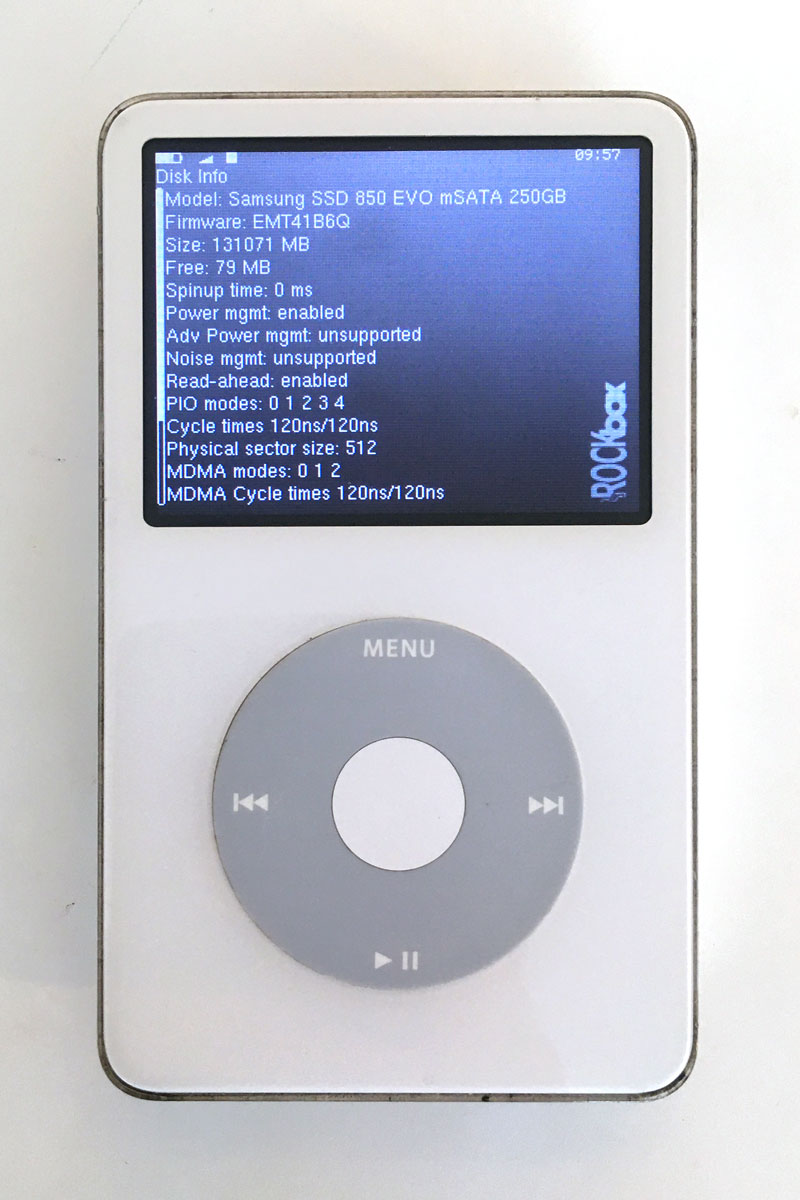
The device was working and this could be the end of the story, but I decided to install Rockbox.
Rockbox
After the trivial process of installing the custom firmware with Rockbox Utility and rebooting the iPod, I was greeted with the ATA error: -11. At the same time, stock firmware was still working fine. After some googling, I found a thread on Rockbox Forums, where the problem was investigated by the development team and solved by the user beyondwind. He also started a thread on Head-Fi Forums, where he posted some additional information. Unfortunately, at the moment of doing the mod, his website was down. Although it was possible to take a glance at it with help of Wayback Machine, almost all the content was unavailable. All, except the file ipod5g_msata_mod.patch, which undoubtedly was the most important. Also, it was saved on GitHub Gist by one of the users at Rockbox Forums.
So, with the patch in my possession, it was possible to build a patched firmware myself. Fortunately, Rockbox Wiki has a detailed guide for building firmware from scratch. The steps for doing so are well described, but I have some notes to make.
1. Getting the source
After cloning the repository, you can already apply the patch. It can be done with a bash command patch -p1 < path_to_file.
Important notice about the patch file — the initial version had some changes for the plugin test_disk.c and included it in the regular build. The plugin code was highly modified since then and this part of the patch wasn’t applicable anymore, so I made the patch file without the mentioned pieces.
2. Building a cross-compiler
Automatic build works fine, but there are 3 caveats:
- I had a lot of difficulties building it on macOS Catalina. After 2 evenings of figuring out the origins of an endless stream of errors, I fired up a VM with Ubuntu 20.04.1 and was able to build the cross-compiler from one of the first tries. Although, a few years ago, when I built it for the first time, I was able to do it without a headache on macOS Sierra;
- The master branch sometimes can be broken. If you have difficulties with building, try checking out a bit earlier commit. For example, this one worked fine when I was building on Ubuntu;
- Make sure that all the dependencies listed on the wiki page are installed — initially, I have issues because of lacking
texinfo.
3. Building Rockbox
Fortunately, there were no issues here!
If everything was done correctly, after copying the freshly built .rockbox directory to the iPod it should just work. Finally, it’s time to copy some tunes and listen to them on your modded device!
And also, there’s a patched build if you need it but don’t want to deal with patching and building.
Afterword
I accomplished this mod in January 2018 and was using the device almost every day since then. Later, I had to replace a battery because the old one dies of old age, but even with the old battery, there were no issues. Battery life is great, access time is instantaneous, and the weight loss is quite perceptible (an old HDD weight is close to the weight of the rest of the iPod). I’d recommend doing it to everyone who wants to give a second life to this classic device!
Files
- ipod5g_msata_mod.patch — initial patch file by beyondwind;
- ipod5g_msata_mod_wo_plugin.patch — modified patch with removed changes for
test_disk.cplugin, prefered for using; - rockbox_msata_mod.zip — patched build from this commit.